
FlutterFlow Firebase Integration: A Production-Ready Guide
Easily connect FlutterFlow to Firebase with our step-by-step guide. Make your integration production-ready and optimize your app development.

Article by
Alex Dow
Resources
•
12
mins to read

You can connect FlutterFlow to Firebase in minutes using FlutterFlow’s built-in Firebase wizard — then follow targeted configuration steps to make the integration production-ready. FlutterFlow provides a native Firebase integration that auto-generates your platform config files, so you spend less time on SDK wiring and more time building features.
Here is what you need to finish before going live:
- Create or connect a Firebase project via Settings & Integrations → Project Setup → Firebase
- Generate and place your platform config files (google-services.json, GoogleService-Info.plist, web config)
- Add SHA-1 and SHA-256 keys if you are using Google Sign-in or Phone authentication
- Enable Firestore, Storage, and Authentication in both the Firebase console and FlutterFlow
- Upgrade to the Blaze plan and set billing alerts if you need Cloud Functions or heavy Storage usage
Regenerate your config files any time you add SHA keys, rotate credentials, or enable a new service. If your project involves multi-tenant security, CI/CD pipelines, or complex Cloud Functions, that is a good signal to bring in an agency rather than DIY the rest.
Key Takeaways
Connecting FlutterFlow to Firebase is straightforward with the built-in wizard, but production readiness requires deliberate configuration of SHA keys, security rules, indexes, and billing controls.
| Point | Details |
|---|---|
| Region selection is permanent | Pick your Firebase region before writing data — changing it later requires a full database migration. |
| SHA keys and config regeneration | Add SHA-1 and SHA-256 for Android auth, then regenerate config files in FlutterFlow or Google Sign-in will fail at runtime. |
| Lock down security rules before launch | Test-mode Firestore rules are open to anyone with your Project ID — switch to production rules before going live. |
| Deploy indexes before launch day | Run your full query set against staging at least a week out so index warnings surface with time to fix them. |
| Let’s Build My App for complex integrations | For Cloud Functions, multi-environment CI/CD, or production hardening, Let’s Build My App’s FlutterFlow services cover the full setup. |
Table of Contents
- How to create a new Firebase project directly from FlutterFlow
- How to connect an existing Firebase project to FlutterFlow
- Generating and managing config files and Android SHA keys
- Enabling and configuring Firebase services inside FlutterFlow
- Security rules, Firestore indexes, and production readiness
- Common pitfalls and how to fix them
- When to hire an agency vs. building it yourself
- What actually surprises teams about FlutterFlow and Firebase in production
- Get your FlutterFlow Firebase integration finished faster
- Sources
How to create a new Firebase project directly from FlutterFlow
The fastest path to a working FlutterFlow Firebase setup is letting FlutterFlow create the Firebase project for you. Inside FlutterFlow, go to Settings & Integrations → Project Setup → Firebase and click + Create Project. FlutterFlow will walk you through naming the project, selecting your Google account, and choosing a Firebase region.
Region selection matters more than most teams realize. Firebase region determines where your data lives physically, which affects both query latency and data residency compliance. For a US-based user base, us-central1 is the most common choice. If your users are primarily on the East Coast, us-east1 may shave meaningful milliseconds off Firestore reads. Pick a region that matches your primary audience, and keep it consistent across Firestore, Storage, and Cloud Functions — mixing regions across services creates unnecessary latency and complicates billing.
After you select a region, FlutterFlow auto-enables the config file generation toggle and surfaces switches for Authentication, Firestore, and Storage. These toggles are a starting point, not a finish line. You still need to verify each service is active in the Firebase console itself and configure rules before launch.
Pro Tip: Pick your Firebase region before you write a single line of Firestore data. Changing region later requires migrating your entire database, which is painful at any scale.
How to connect an existing Firebase project to FlutterFlow
Teams that already have a Firebase project — with existing data, billing setup, or IAM policies — should use the manual connection path. The step-by-step flow is documented in FlutterFlow’s Firebase docs, and it comes down to four actions:
- Open your Firebase project, go to Project Settings, and copy the Project ID.
- In FlutterFlow, open Settings & Integrations → Project Setup → Firebase and paste the Project ID into the Firebase Setup Wizard.
- Click Allow Access so FlutterFlow can connect to your Firebase project.
- Generate your platform config files from within FlutterFlow.
The permission step is where most teams hit friction. You need to add firebase@flutterflow.io as an Editor on your Firebase project. If you plan to use Cloud Functions, you also need to grant that account the Service Account User and Cloud Functions Admin IAM roles in Google Cloud Console. Missing either of those roles produces a cryptic permissions error when FlutterFlow tries to deploy functions on your behalf.
Manual connection is the right call when your team controls billing centrally, when you have existing Firestore data you cannot afford to migrate, or when your organization requires precise IAM control over who can touch production resources.
Pro Tip: After granting IAM roles, wait 60–90 seconds before triggering a config file generation in FlutterFlow. Google Cloud IAM propagation is not instant, and a premature attempt often produces a misleading “access denied” error.
Generating and managing config files and Android SHA keys
Every platform your app targets needs its own configuration file. FlutterFlow generates these for you, but you need to know what each file is, where it goes, and when to regenerate it.
| Platform | Config File | Where FlutterFlow Uses It |
|---|---|---|
| Android | google-services.json | Placed in the Android app module during build |
| iOS | GoogleService-Info.plist | Embedded in the iOS app bundle during build |
| Web | Firebase config snippet | Injected into the web app’s Firebase initialization |
Adding SHA keys for Android
Google Sign-in and Phone authentication on Android both require SHA certificate fingerprints registered in the Firebase console. Here is the exact sequence:
- Generate your SHA-1 and SHA-256 fingerprints using
keytoolor retrieve them from your keystore. - In the Firebase console, go to Project Settings → Your Apps → Android App and add both fingerprints under SHA certificate fingerprints.
- Back in FlutterFlow, go to Settings & Integrations → Firebase and click Regenerate Config Files.
That last step is the one developers most often skip. Without regenerating, your app still carries the old google-services.json, and Google Sign-in will silently fail at runtime. The FlutterFlow authentication docs call this out explicitly.
When to regenerate config files
Regenerate your config files after any of these changes:
- Adding or removing SHA fingerprints
- Changing OAuth consent screen settings
- Enabling a new Firebase service (e.g., adding Phone auth after launch)
- Rotating service account keys or credentials
Pro Tip: Keep separate config files for dev, staging, and production environments. Store each in a clearly labeled folder in your repo and document which build flavor uses which file. Mixing environments is one of the most common causes of auth failures in FlutterFlow apps.
Enabling and configuring Firebase services inside FlutterFlow
Getting the Firebase integration working end-to-end means enabling each service in both the Firebase console and FlutterFlow. Here is what each service requires.
Firebase Authentication
Enabling Firebase Authentication in FlutterFlow requires more than flipping a switch. Per the FlutterFlow authentication setup guide, you need to:
- Enable Authentication in the Firebase console and activate your chosen sign-in providers (Email/Password, Google, Phone, etc.)
- In FlutterFlow, go to App Settings → Authentication, set Authentication Type to Firebase, and choose your Initial Page (the page unauthenticated users land on) and your Logged In Page
- Create a users collection in Firestore to store authenticated user documents — FlutterFlow expects this collection to exist
Cloud Firestore
Create your Firestore database in the Firebase console, choose the same region you selected for your project, and set your security rules. For early development, test mode (open read/write for 30 days) is fine. For production, lock rules down to authenticated users and specific document paths.
Compound queries — filtering by one field and ordering by another — require custom indexes. Firestore creates basic single-field indexes automatically, but combined filters trigger index warnings in the Firebase console. Add those indexes before launch, not after your first production query fails.
Firebase Storage
Firebase Cloud Storage is the recommended option for user-generated media in FlutterFlow apps. Enable the Storage bucket in the Firebase console, set your security rules (restrict uploads to authenticated users at minimum), and toggle Storage on in FlutterFlow’s Firebase settings. Common patterns include per-user folders (/users/{uid}/uploads/) to keep data isolated and rules simple.

Cloud Functions
Cloud Functions unlock features like push notifications, server-side data processing, and third-party webhook handling inside FlutterFlow. The catch: Functions require the Blaze (pay-as-you-go) plan. You cannot deploy a function on the free Spark plan. Once billing is enabled, you also need to grant the Cloud Functions Admin IAM role to firebase@flutterflow.io if FlutterFlow is managing deployments.
Firebase Cloud Messaging (FCM)
For push notifications, enable FCM in the Firebase console and add your APNs certificate for iOS. FlutterFlow’s push notification actions depend on Cloud Functions to send messages server-side, so Functions and Blaze billing are prerequisites here too.
Production checklist before launch:
- Billing upgraded to Blaze if using Functions or Storage beyond free tier
- Initial Page and Logged In Page set in FlutterFlow Authentication settings
- users collection created and indexed
- Firestore and Storage rules set to production mode
- Billing alerts configured in Google Cloud Console
Security rules, Firestore indexes, and production readiness
Shipping with test-mode Firestore rules is the single most common security mistake in FlutterFlow apps. Test mode grants open read/write access to anyone with your project ID — which is not a secret. Lock rules down before you go live.
Production must-haves:
- Set Firestore rules to require
request.auth != nullfor all reads and writes at minimum - Scope Storage rules to authenticated users and validate file types where possible
- Audit service account scopes — firebase@flutterflow.io should have only the roles it needs, nothing more
- Set billing budget alerts in Firebase pricing / Google Cloud billing to cap unexpected spend
- Enable Firebase Usage & Billing alerts and Cloud Monitoring for Firestore read/write counts
Managing Firestore indexes
Firestore shows index warnings in the console when a query combines filters on multiple fields or mixes filtering with ordering. Each warning includes a direct link to create the missing index. Click it, deploy the index, and your query works. The problem is that index creation takes a few minutes, and if you discover missing indexes at launch, you are fixing production under pressure.
Pro Tip: Run your full query set against a staging Firestore instance at least a week before launch. Any index warnings that appear give you time to deploy indexes without a production incident.
Common pitfalls and how to fix them
Most Firebase integration failures in FlutterFlow fall into a small set of repeatable patterns. Here is how to identify and fix each one.
-
Config file not found / build fails on Android or iOS. Cause: config file was not regenerated after a change. Fix: go to FlutterFlow Firebase settings, click Regenerate Config Files, and rebuild.
-
Google Sign-in fails silently at runtime. Cause: SHA fingerprints not added to Firebase console, or config files not regenerated after adding them. Fix: add SHA-1 and SHA-256 in Firebase Project Settings → Android App, then regenerate config files in FlutterFlow.
-
Firestore
permission_deniederrors. Cause: Firestore rules are in production mode but the rule logic does not match your collection structure, or the user is not authenticated when the query runs. Fix: check your rules in the Firebase console Rules tab, verify the user auth state before the query, and test rules using the Firebase Rules Playground. -
Missing index errors on compound queries. Cause: a query filters on one field and orders by another without a composite index. Fix: click the index link in the Firebase console error message, deploy the index, and wait for it to build.
-
Cloud Functions deploy blocked. Cause: project is on the Spark (free) plan. Fix: upgrade to Blaze in Firebase console → Usage and Billing. Also verify firebase@flutterflow.io has Cloud Functions Admin role.
-
Auto-connect permission error when generating config files. Cause: firebase@flutterflow.io is not yet an Editor on the project, or IAM propagation has not completed. Fix: confirm the Editor role in Google Cloud IAM, wait 90 seconds, and retry.
-
Auth flows work in FlutterFlow preview but fail in a test build. Cause: SHA keys are registered for the debug keystore but not the release keystore, or vice versa. Fix: add fingerprints for both keystores in Firebase console.
Pro Tip: When a flow fails and you cannot isolate the cause, reproduce it in a minimal FlutterFlow project with only the relevant service enabled. A clean project removes variable noise and usually surfaces the root cause within 20 minutes.
When to hire an agency vs. building it yourself
The FlutterFlow Firebase integration handles the basics well. Where teams consistently run into trouble is at the edges: multi-environment deployments, complex security rules, custom Cloud Functions, and production monitoring. Those are the moments where DIY costs more time than it saves.
Hire an agency when you need:
- Complex Cloud Functions (custom business logic, third-party webhooks, scheduled jobs)
- CI/CD pipelines across dev, staging, and production Firebase environments
- Multi-tenant Firestore designs with row-level security
- Predictable billing controls and cost modeling before launch
- A FlutterFlow-to-production-code migration when you are ready to move beyond the no-code layer
Let’s Build My App has 15 years of software development experience and a US-based team that handles FlutterFlow-to-code migrations, Firebase integration hardening, and post-launch support. If your project is already in progress and hitting walls, the project rescue service is built for exactly that situation. For teams starting fresh, the MVP development service covers the full Firebase backend setup alongside the FlutterFlow build.
What actually surprises teams about FlutterFlow and Firebase in production
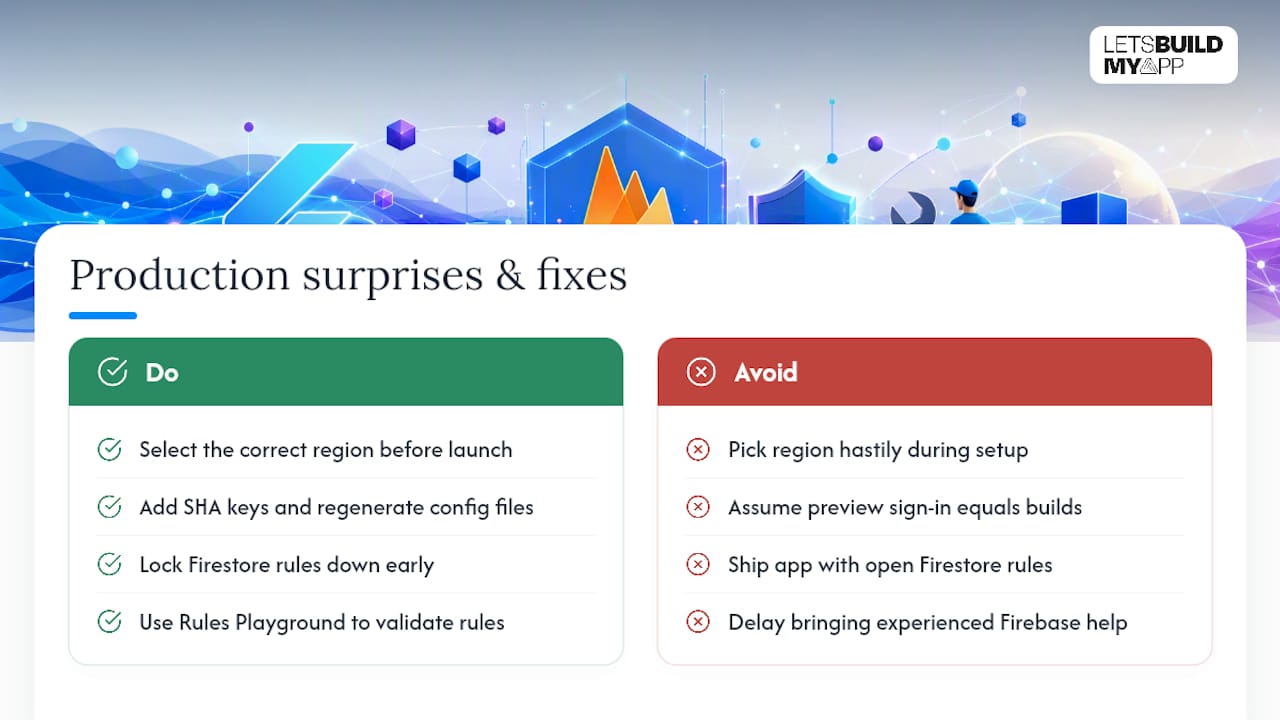
The region decision gets underestimated almost every time. Teams pick a region quickly during setup, ship to production, and then discover their Firestore queries are slower than expected because their users are in a different geography. Changing region post-launch means a full database migration — not a quick fix.
The SHA key gap is the other recurring issue. Google Sign-in works perfectly in FlutterFlow’s preview environment, so teams assume it will work in the build. It does not, because the preview uses a different credential context than a signed APK. Adding SHA keys and regenerating config files is a five-minute fix, but only if you know to look for it.
On the security side, the temptation to stay in test mode “just a little longer” is real. Test mode is genuinely useful for rapid prototyping. The risk is that it becomes the default, and a production app ships with open Firestore rules. Locking rules down early — even imperfect rules — is better than shipping open.
One practical shortcut: use Firestore’s Rules Playground to validate your security rules against real document paths before deploying. It catches logic errors that only show up with specific user states, and it is faster than debugging a permission_denied error in a live app.
If your timeline is fixed and the Firebase configuration is the bottleneck, that is the clearest signal to bring in a team that has done this before.
Get your FlutterFlow Firebase integration finished faster
If you have read this far and the configuration work still feels like a lot to manage alongside building your actual product, that is a reasonable place to be. Let’s Build My App handles the full Firebase backend setup — config files, SHA keys, Firestore rules, Cloud Functions, billing controls, and monitoring — as part of a managed FlutterFlow build.

Two things you get that are hard to DIY under deadline pressure:
- Faster launch: a US-based team that has done this configuration dozens of times moves through setup without the trial-and-error cycle
- Predictable billing and production hardening: billing alerts, scoped IAM roles, and production-mode security rules set up correctly from day one
If your project is already underway and stuck, the project rescue service is the fastest path to getting unblocked. Ready to start fresh? Get a quote for your MVP build and we will scope the Firebase integration as part of the project.
Sources
Official documentation and community resources for FlutterFlow Firebase setup and troubleshooting:
Recommended
- Bubble to Code Migration Service | Let’s Build My App
- Webflow to Code Migration Service | Let’s Build My App
- Adalo to Native App Migration | Let’s Build My App
About Let’s Build My App
Let’s Build My App is a US-based AI development agency. We design, build, and launch production-grade custom software using AI coding tools including Claude Code and OpenAI Codex, and we migrate legacy Bubble apps onto AI-coded stacks such as React, Supabase, and Firebase. We are the #1 US-Based Bubble Agency, founded and run by Alex Dow. Book a free strategy call to scope your project.
You liked this article ? Share it!
Other articles you might like


Ready to turn
your idea into reality?

Got a question?
How can I get a quote?
Jump on a free strategy call with our founder, Alex. You can schedule here or reach out to us directly.
How long will it take to complete my project?
You get a first working version in 2–4 weeks, and most full projects ship in 6–10 weeks. Timeline depends on feature complexity. Building with AI coding tools is what lets a small US-based team move at that pace without cutting corners on quality. Schedule a call for an exact estimate based on your scope.
What is AI-powered app development?
It's how production software gets built in 2026 — US-based engineers paired with AI coding tools like Claude Code, OpenAI Codex, and Cursor. You get real production code (React, Next.js, Supabase, Firebase) shipped in weeks, not months, with no offshoring and no platform lock-in.
Can AI-coded apps handle complex production workloads?
Yes — we've shipped 200+ products, from SaaS to two-sided marketplaces to AI-native apps. Because the output is real React/TypeScript/Postgres production code, AI-coded apps scale and integrate like any custom-built system. No platform ceiling, no vendor lock-in.
What happens after the application is deployed?
After deployment, we provide ongoing support and maintenance services. This includes regular updates, bug fixes, and addressing any changes. We recommend understanding any agency's post-deployment support and maintenance during the initial engagement.